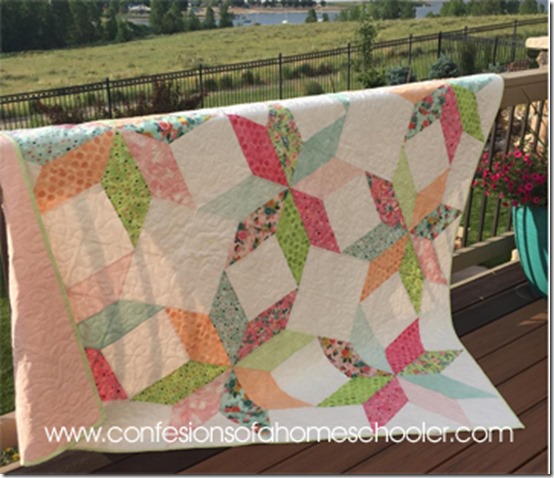
Hi everyone! As promised, I have a super fun and easy quilt tutorial for you today. This one is great for beginners and comes together really quickly. It uses all HSTs which means “Half Square Triangles”. There are a lot of ways to create HSTs, and several different designs you can get simply by turning them around. Today I’m going to show you an easy way to create 4 HSTs at one time.
You can use any fabric selection you like, but I thought I’d share with you what I used just in case you were curious.
- Background: 2-3/4 yards Moda Bella White 9900-97
- Stars: 18 FQs, I used Fresh Cut by Basic Grey for Moda
- Backing & Batting: 4-1/2 yards backing fabric & batting (I use Warm N White 100% cotton batting)
- Binding: 2/3 yards, sub cut into 8 – 2.5” WOF strips (WOF = width of fabric)
Watch the Sherbet Stars Quilt Tutorial here!
For those of you who like to reference the cutting instructions in print, here you go!
Cutting Instructions:
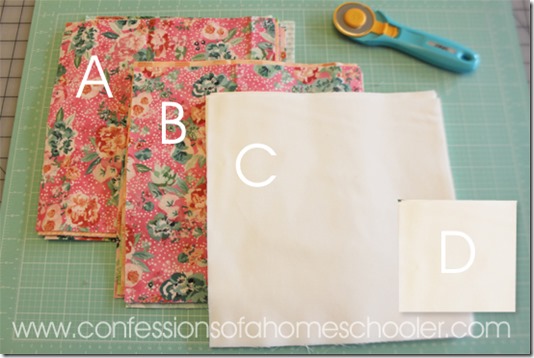
- From your 18 FQ: sub cut into 36—10” x 10” squares. Make sure to cut 2 squares from each fabric so you have 2 identical piles (A & B) with18 squares each.
Background Fabric: 1-1/2 yards background fabric
- Cut 18 – 10” x 10” squares (C)
- Cut 36 – 6-3/4” x 6-3/4” squares (D)
Batting and Backing:
- 4-1/2 yards backing and batting
Binding:
- 2/3 yards fabric, cut into 8 –2.5” WOF strips
Note: Sew and trim all seams to 1/4” unless otherwise directed. You are also welcome to add sashing or borders to make this quilt even larger if you wish! Just make sure to adjust your batting, backing, and binding requirements to fit the size of your quilt!
Sewing Instructions:
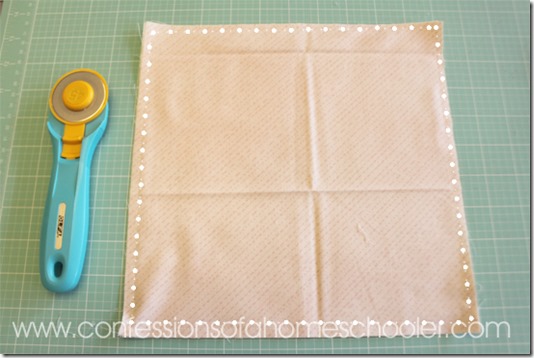
Choose 2 contrasting patterned fabrics from pile A and sew them right sides together sewing 1/4” all the way around the outside of the square.
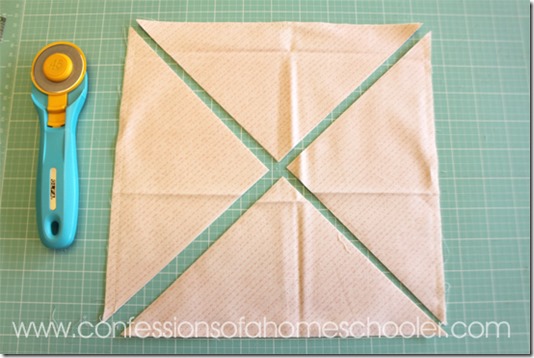
Then cut your sewn square into 4 pieces diagonally as shown below. Press towards the dark. Repeat with remaining fabrics in pile A, you will have a total of 36 HSTs. Trim them to 6-3/4” square. Just be gentle as the HSTs will be a little stretchy since we cut the fabric on the bias.
Repeat the same process using one patterned square B and one background square C. Repeat with remaining fabrics in pile B and C. You will have 72 HSTs, trim to 6-3/4” square.
ASSEMBLY:
You should now have 36 pattern/pattern HSTs and 72 pattern/background HSTs.
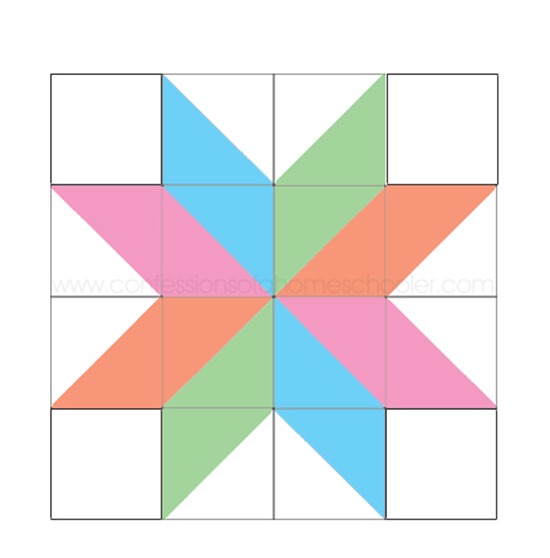
Arrange your HSTs as shown below, this is the basic Sherbet Star block layout, your finished block will measure 25.5” square.
If you don’t want a quilt this large, you can easily make it any size you like. Just makes sure all of of your HSTs are the same size, then cut the corner blocks to match your HST size.
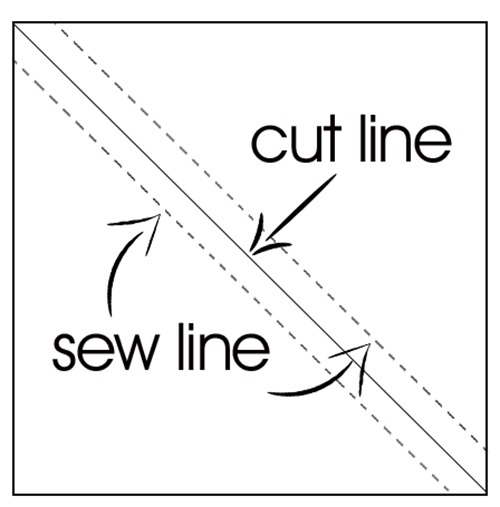
If you’d like to use smaller squares, you can make a HST like this. Draw a line corner to corner on one of your fabric squares. Place 2 fabrics right sides together, and sew 1/4” down both sides of the center line. Then cut along your center line and press open. This method yields two HSTs instead of four like the method I used for this quilt.
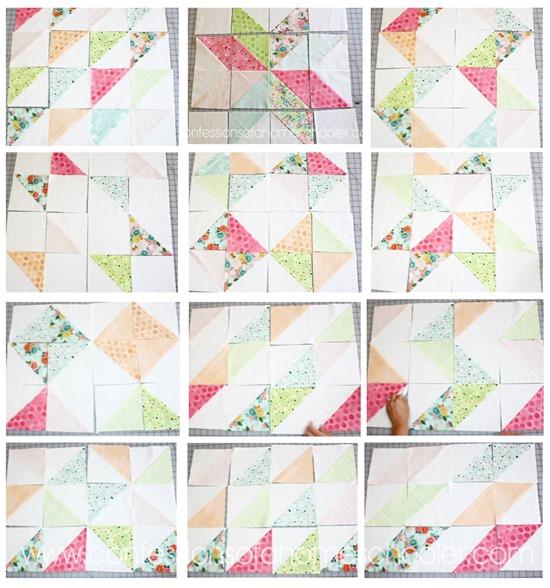
As mentioned in the video, there are several different layouts you can make using all HSTs. Here are just a few more fun HST layout ideas for you!
I hope you enjoyed this tutorial, and make sure to tag me on social media, or send me a pic via email if you make this quilt! I’d love to see what you create!
Here are a few of my Quilting Tutorials online:
- Pink Pig Rag Quilt
- DIY Tic-Tac-Toe Board Game (*Great for learning beginning skills!)
- Patchwork Book Cover
- Quilt-as-you-go Book Cover
- Kids Pillow with Pocket
- How to Applique’ Basics (Don’t worry it’s super easy!)
- Thread Catcher Tutorial
To keep up with our shenanigans, feel free to follow me:
- YouTube Channel
- Instagram (LOTS of quilty goodness there!)


Erica, one question: how do you go about actually quilting your quilt once you have the quilt top finished? Do you use your machine at home? Your quilts are beautiful! I’m really enjoying your quilt tutorials. Thank you for sharing!
Sarah
Sarah … I am wondering the same 😊 Sure is a beautiful quilt!
I free motion quilt them, I’ll have a video tutorial for that coming up!
That is a beautiful quilt! I am pumped and ready to start quilting!!!! Your youtube video makes it look so easy! I see Christmas and birthday gifts in the future! By the way I’m a homeschool mom also, who loves to sew! Thanks for sharing all your sewing projects with us. Did you free motion quilt this? Just wondering. Thanks again
Yes, I did and I’ll have a video on how to do that coming soon!
This is a very beautiful quilt. I am a beginner quilter, started with a rag quilt last month. I’m anxious to do this quilt next. Love your quilting videos they are inspiring & helpful. Thanks!
Nice! What sewing machine do you use? I want my daughter to learn this. Would this be too tricky for a first-time project?
I have a Juki G-210 sewing machine and love it!
I love HST quilts!
Erica, I’m a beginning quilter, I love your blog and videos!! I’d like to make the quilt a little smaller, can I just adjust the squares to 8×8?
Yes of course, you can make them any size you like as long as they’re all the same 🙂
Erica, I just began working on this pattern. I believe your background fabric needed should be 2 1/2 yards instead of 1 1/2 yards. I bought 2 yards, and it’s not enough.
Oh my goodness you’re right! Actually I moved it to 2-3/4 yds 🙂 Thanks so much for letting me know!
Dear Erica,
How can you get 2 ten inch squares from a fat quarter is one side measures 18″?
Hi Shannon,
A FQ measures 18″ x 22″ so if you cut two 10″ squares along the 22″ side you should be good 🙂
Hi Erica, I have been following your quilting series and I just finished my first quilt (just the piecing)! Thank you for your helpful tutorials. I really want to tackle this quilt next but I don’t want to have it so big. Can you please tell me how big I need to make the (10″) squares if I only want my quilt to be approximately 50″x50″ or in that area. And I want to put a border around it as well. Just having a hard time figuring out the math!!!! Thank you! You’re amazing.
Hi Cathie,
For each seam you’ll lose 1/2″, so if you used five 10″ squares across you’d lose 2″ total making your finished row 48″. So you might want to add borders to it to make it larger. But typically you can just add up your blocks going across and then subtract for your seam allowance to figure out your final size.
I am very new to quilting and would love to see the best way to cut the squares. Do you have a fabric cutting tutorial? Thank you, love your blog and tutorials!
Yes, in my How to Quilt 101 Series here: http://www.confessionsofahomeschooler.com/blog/category/how-to-quilt