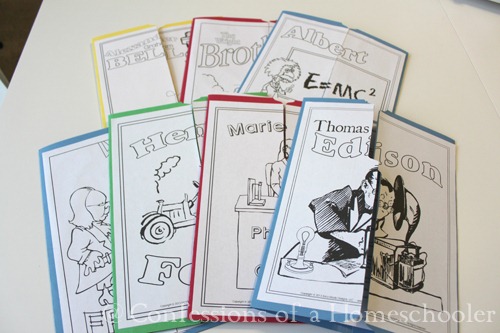
Hi everyone! I get a lot of questions on how to create lapbooks, and how we use them in our homeschool. I thought it would be easier to show you all in a “How To Make a Lapbook” video tutorial for you! First I wanted to talk a little bit about what a lapbook is and how to use it in your homeschool or classroom.
So what is a lapbook? Lapbooking is simply a hands-on method of teaching students about any topic! They can include drawings, writings, timelines, pictures, graphs, and any other information that fits your topic. They can be as simple or complex as you like based on the age of your students. Speaking of ages, while they’re typically used for younger elementary level students, really Lapbooks can be used for any aged student as the content is completely up to you!
Lapbooks are an effective learning tool because they incorporate hands-on educational activities that can accompany any lesson. They’re also great to help review materials learned later on.
As students learn about a particular topic, they’ll create “mini-books” that are slowly added to a larger Lapbook. So in the end they’ll have a lovely final product that they can keep for years to come!
So how do you put a Lapbook together?
In this video we’ll be creating the following Lapbooks:
- Basic Tri-fold Lapbook
- Flap Up Lapbook
- Double Lapbook
- Triple Lapbook
- 8×10 pocket
- 8x 5.5 pocket
Watch the How to make a Lapbook Video:
Basic Lapbooking Supplies:
- File Folders (We prefer colorful ones)
- Paper & Printer for mini-books
- Scissors
- Glue
- Tape
- Markers, crayons, colored pencils, etc.
How do we use lapbooking?
We typically use them to learn about something specific. Sometimes we’ll add them in simply for a fun unit study, and sometimes we create them to go with a particular subject or concept we’re learning about.
For example, sometimes I’ll let the kiddos pick their own topic they’d like to learn more about. So Turbo did one on sharks, Strawberry Shortcake did one on Horses, and Tinker Bell did one on her favorite book “Jesse Bear What Will You Wear”.
As most of you know, our favorite ways to use them are to learn about things like specific artists, composers, scientists, and literature. As we read about these people, or through books, we create small mini-books to add to a larger lapbook. The process of making these smaller pieces really helps the kiddos to remember what they’ve learned about. And of course at the end of the unit, we have a fun and interactive booklet that they can use to review, and keep for years to come!
Helpful Lapbooking Websites & Links mentioned in the video:
- Lapbook Lessons
- Homeschool Share
- My Literature Lapbooks
- My Science & Inventor Lapbooks
- Famous Artists Lapbook & Unit Study
- Famous Composers Lapbook & Unit Study
- Jesse Bear Lapbook
- Google (Simply google any topic you like adding the word “Lapbook” to the end and you’ll be amazed at the amount of resources that can be found online!)
I hope you enjoyed this video tutorial on how to make your own Lapbooks, if you have any good Lapbook tips to share, make sure to leave a comment below!


Love this! Can’t wait to make one with my five year old!!!
Thank you so much for this post! It was so helpful! I would also love to see a post about how you organize and store all of your lapbooks.
Your Lapbook ideas are lovely. We have just started to use them here for our home schooling. My youngest has made a Maths one first.
We are in the UK.
Thanks for this great idea to do with kids when i go speak to them about my art and my book
Hi,
Thanks for the great tutorial! When leading a small co-op class. Should each child’s lapbook be in the same layout at the others and also use the “same” templates”? Or, would it be ok to let the kids get as creative as they want and put things to gether the way they like. They’re Jr. High.
Thanks for the advice. Cathy K.