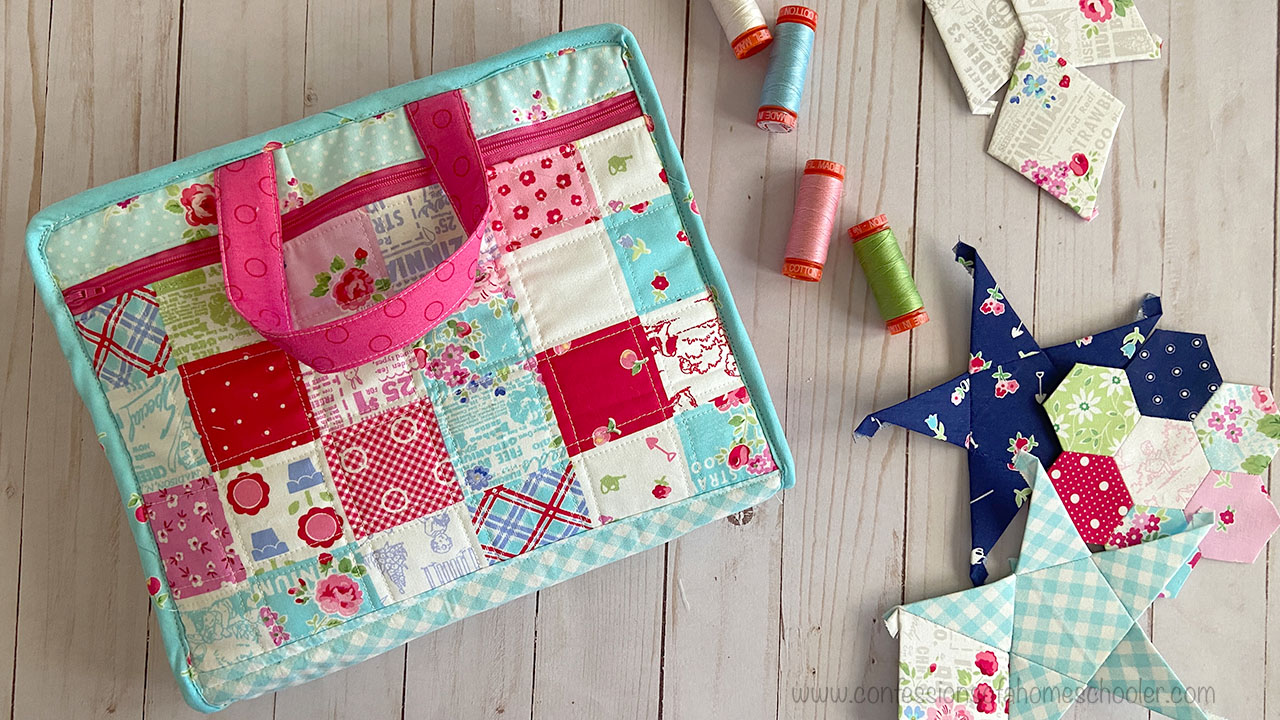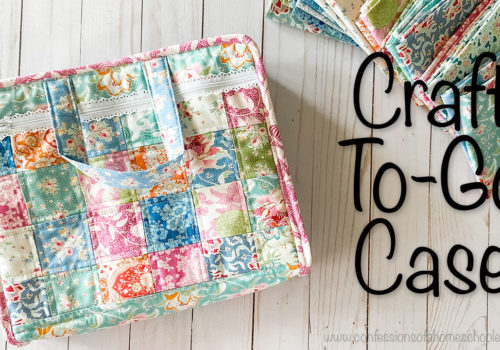
Happy Tutorial Thursday friends! Today I’m showing you how to make this adorable Craft To-Go Case which is perfect for taking just about any craft with you on the go!
Do you prefer written patterns?
Get the Craft To Go Case PDF here!
The PDF pattern includes step-by-step written instructions along with graphic illustrations to help make this cute pattern a breeze!
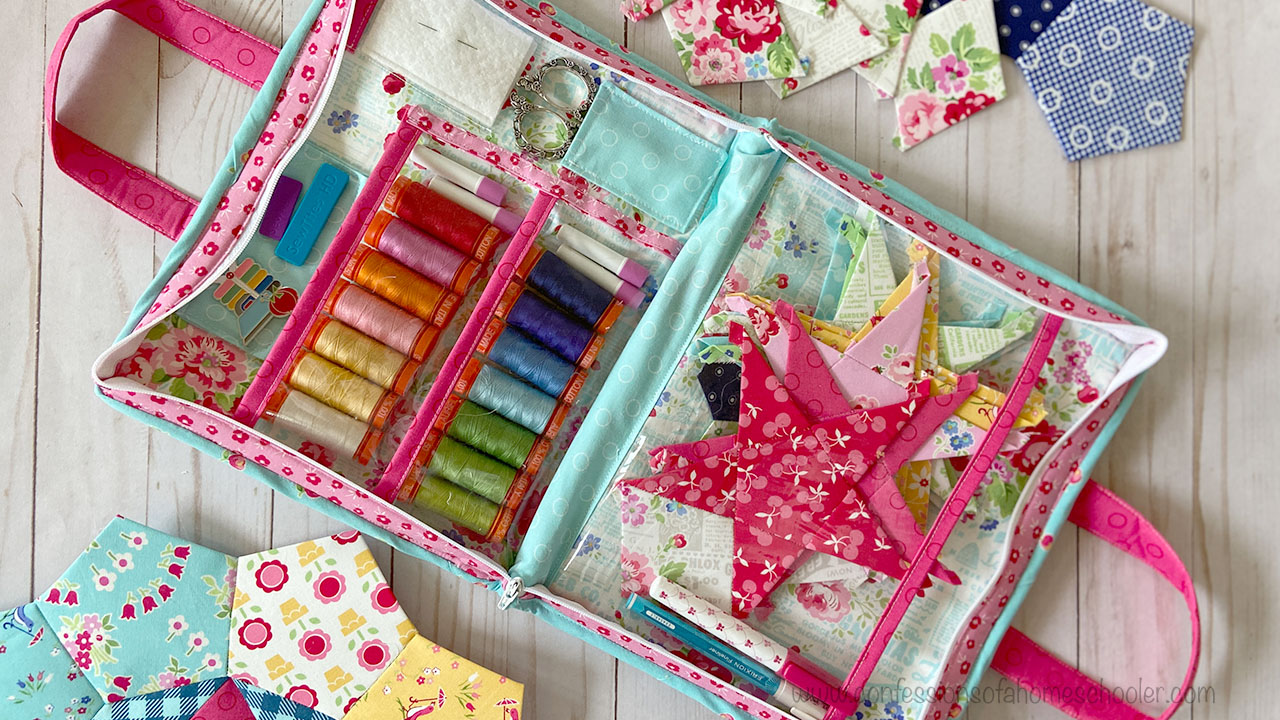
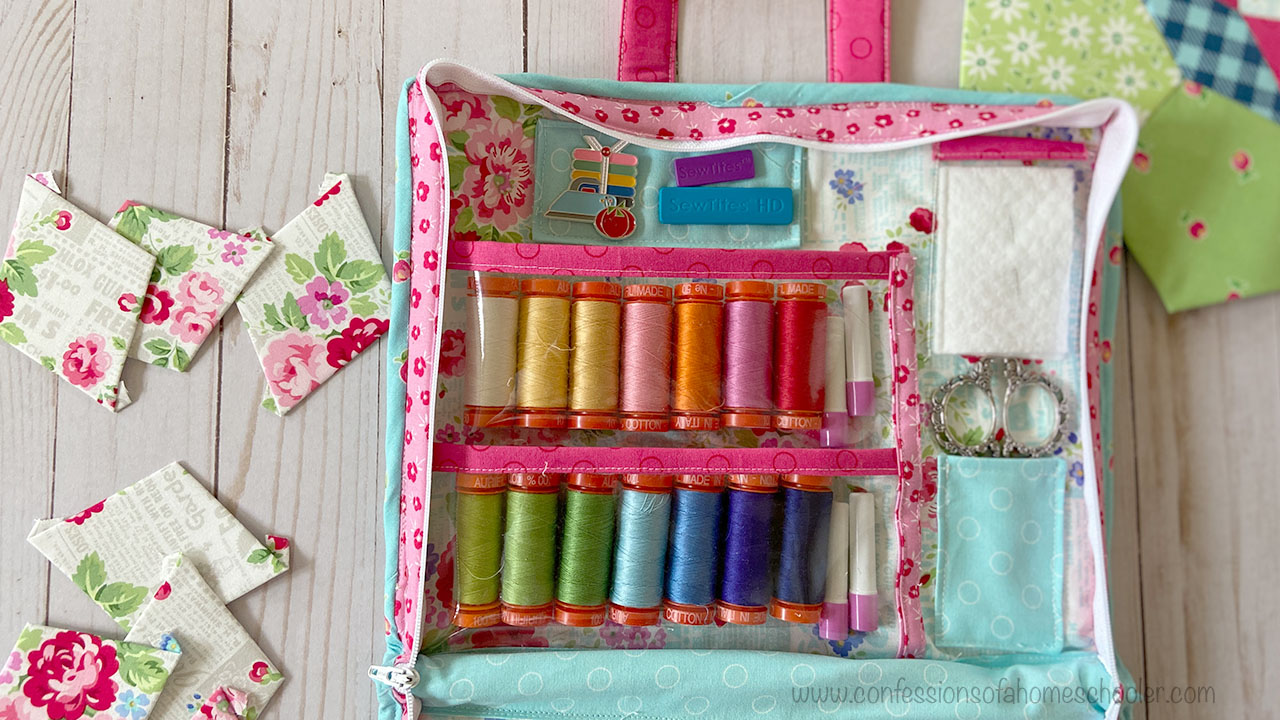
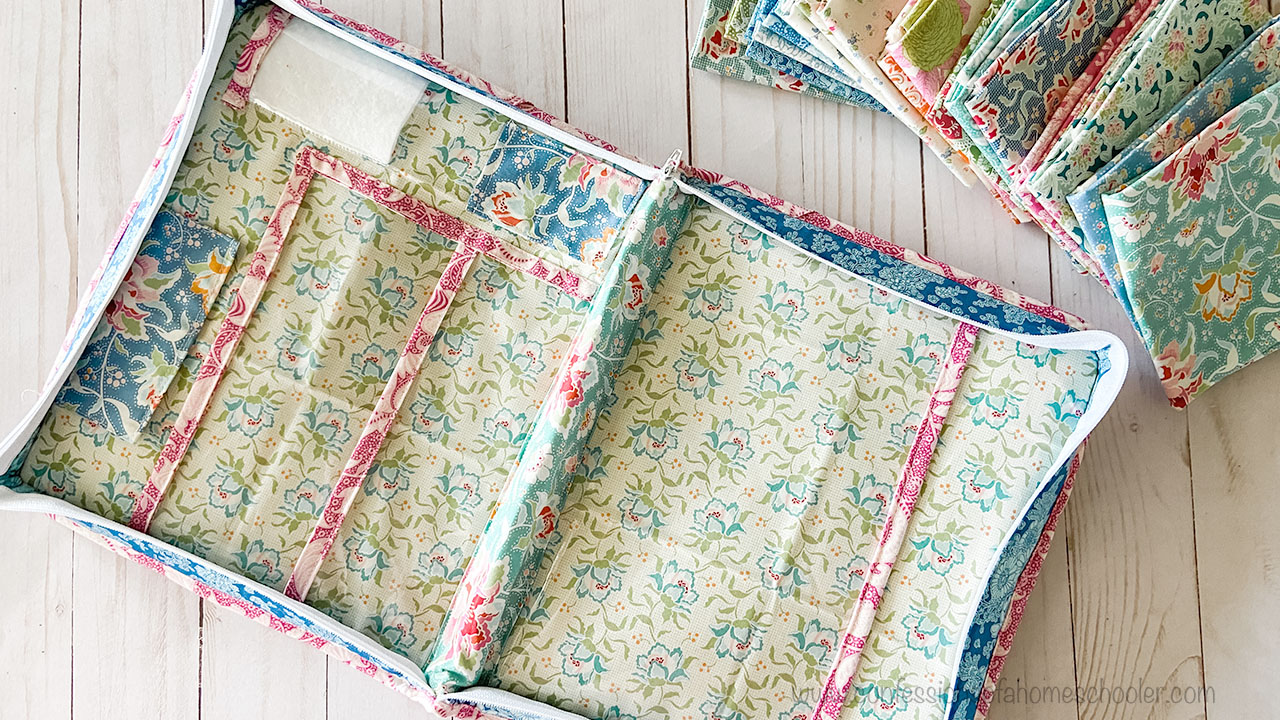
This project finishes at 11″ h x 9″ x 2″ deep, so it’s the perfect size for crafts on the go!
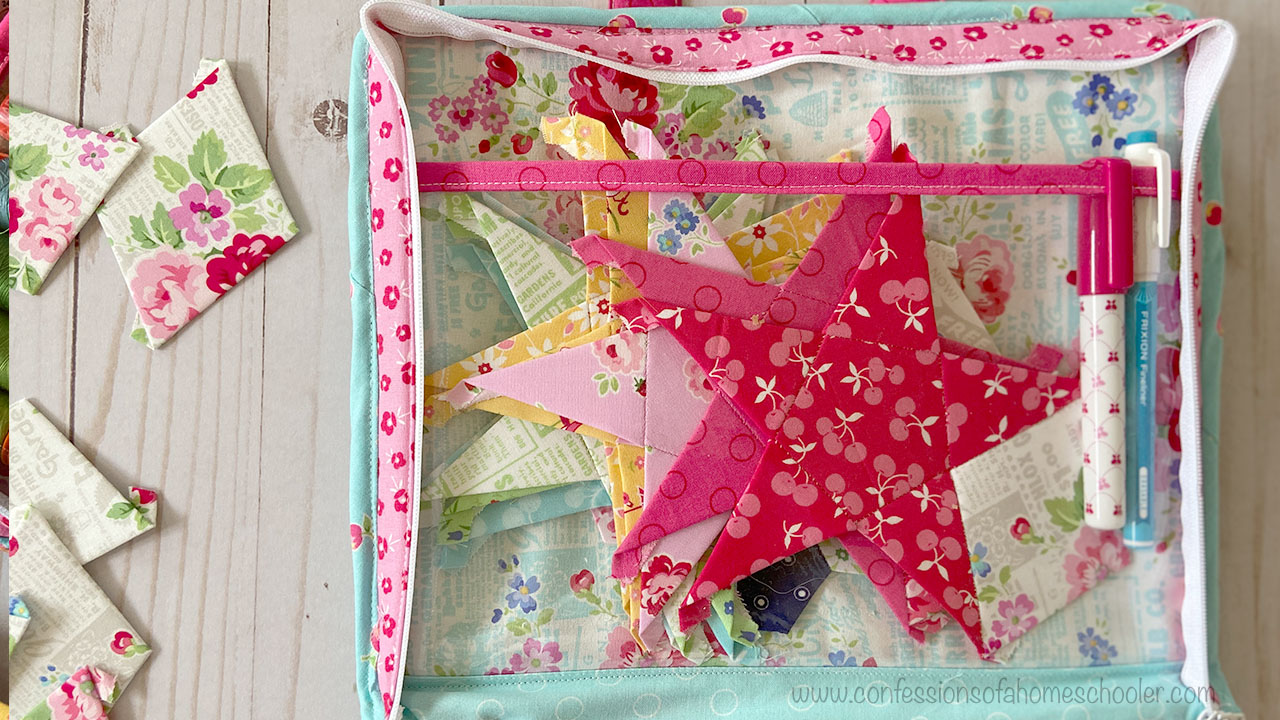
But really this fun little case would be perfect for any type of stitching craft, travel, and even school supplies! I plan to use mine for my English Paper Piecing. That way I can bring my sewing projects with me when I’m driving kids around.
Ready to get started? Watch Erica’s Craft To-Go Case tutorial here
Fabric
I’ve been working on sewing through my stash this year, so for the video, I chose some fun fabric that I’ve had around for a while for this project. I decided to pull out some of my Tilda fabrics. This line is called Circus Rose and it has the best colors, florals, and has a modern vintage vibe to it.
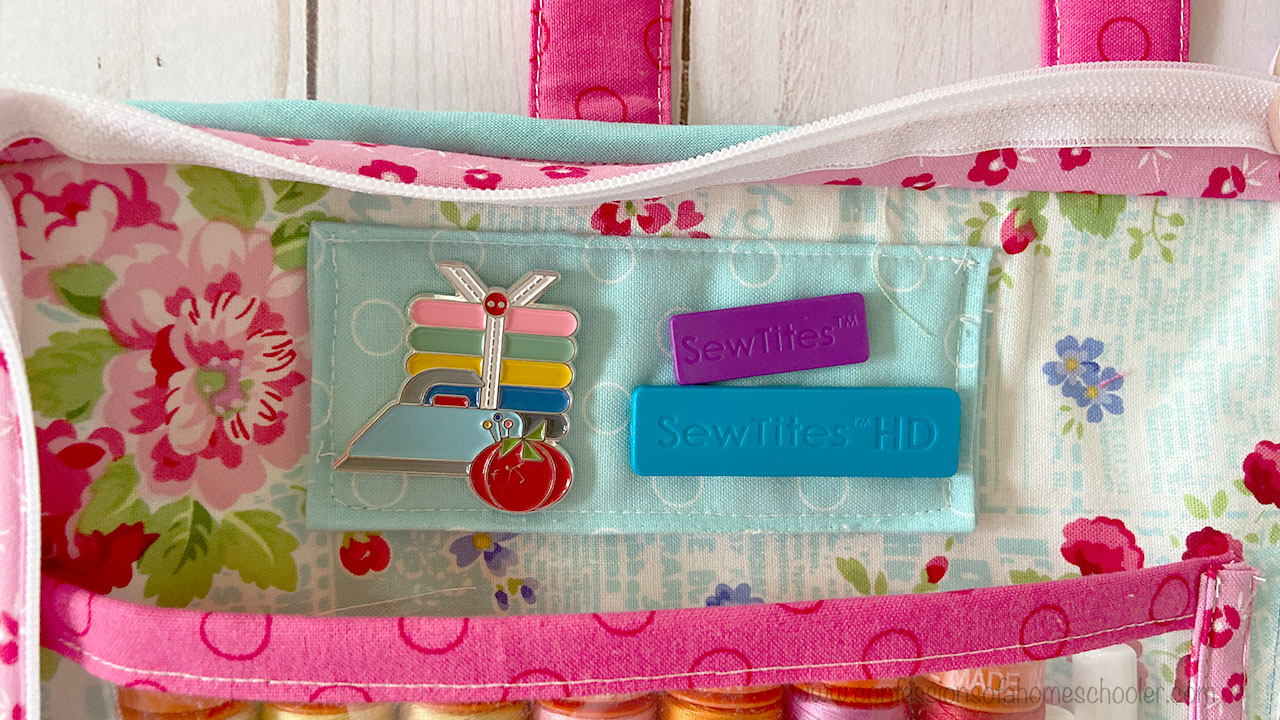
I also used this adorable scalloped zipper, which gives the front pouch a little something extra.
For stability, I used a Bosal Double-Sided Fusible Foam which worked perfectly! It really gave my bag a nice structure. I also added some patchwork quilting to the front pocket which I think adds to the cuteness but also helps to stabilize the bag even further.
What would you use this fun bag for? Leave me a comment below!

For my second bag, I used some of my Pam Kitty Morning fabric. It’s such a fun colorful line and I used a cheater print for the front. It looks like I put together a patchwork section as I showed you in the video, but it’s actually a panel that is printed to look like patchwork. So all I had to do was add some quilting lines and it looks like I did a lot of work, but it was super easy!